Sunday 31 May 2020

Chapter 14 // Exercise 5 - Principles & Practice Using C++

In this exercise I am using Visual Studio 2017 and the graphics files found here:
https://github.com/l-paz91/principles-practice/tree/master/Graphics%20Files

Chapter 14 // Exercise 5

Define a Striped_Rectangle where instead of fill, the rectangle is "filled" by drawing one-pixel-wide horizontal lines across the inside of the rectangle (say, draw every second like that). You may have to play with the width of the lines and the line spacing to get a pattern you like.

Github: https://github.com/l-paz91/principles-practice/tree/master/Chapter%2014/Exercise%205


He kind of contradicts himself here. Does he want me to fill it with one pixel wide lines or whatever width I'd like? I decided to go with whatever width you'd like.


Chapter 14 // Exercise 5 - Principles & Practice Using C++

This also made me realise a much easier and cheaper way to do colour gradients as a fill:


Saturday 30 May 2020

Chapter 14 // Exercise 4 - Principles & Practice Using C++

In this exercise I am using Visual Studio 2017 and the graphics files found here:
https://github.com/l-paz91/principles-practice/tree/master/Graphics%20Files

Chapter 14 // Exercise 4

Define a class Immobile_Circle, which is just like a Circle but can't be moved.

Github: N/A

For this you can declare a private section of your class and then put the functions you don't want a class to be able to override in there:


When you go to use the functions on a named Immobile_circle object the compiler will error:


Friday 29 May 2020

Chapter 14 // Exercise 2, 3 - Principles & Practice Using C++

In this exercise I am using Visual Studio 2017 and the graphics files found here:
https://github.com/l-paz91/principles-practice/tree/master/Graphics%20Files

Chapter 14 // Exercise 2

Try to copy a shape. What happens?

Github: N/A


This usually shouldn't work, however if you're using a recent version of my Graph.h and Graph.cpp files; it does work. Early in Chapter 11, I got annoyed that I couldn't return shapes; so I commented out the constructor that prevents you from doing so. Back then it wasn't explained why he had done it but he does in this chapter and it's to prevent you from attaching shapes to the window in places where the shape can go out of scope. It's useful to be able to return shapes though so I will leave it the way it is.

Chapter 14 // Exercise 3

Define an abstract class and try to define an object of that type. What happens?

Github: N/A


This question is identical to Drill 5. If you make a class and define any part of it as abstract/pure virtual (i.e., '=0') then the compiler will fail to build. Abstract classes must be derived and given definitions in the child classes.

Thursday 28 May 2020

Chapter 14 // Exercise 1 - Principles & Practice Using C++

In this exercise I am using Visual Studio 2017 and the graphics files found here:
https://github.com/l-paz91/principles-practice/tree/master/Graphics%20Files

Chapter 14 // Exercise 1

Define two classes Smiley and Frowny, which are both derived from class Circle and have two eyes and a mouth. Next, derive classes from Smiley and Frowny which add an appropriate hat to each.

Github: https://github.com/l-paz91/principles-practice/tree/master/Chapter%2014/Exercise1


This took me a bit longer than I thought it would, mainly because I forgot how fl_pie() works:
The top left corner of the rectangle is where fl_pie() draws from; not from the center of the circle which would honestly make more sense. So instead of figuring out where you want the center of the circle to be; calculate the top-left of the bounding box.

For the "appropriate hat", I wanted to use images. However, there was no way to resize the image to fit whatever radius the circle was. I looked around FLTK and found a badly named function called copy() that creates a new version of the image and resizes it if given a width and height.


Tuesday 26 May 2020

Chapter 14 // Drill 1, 2, 3, 4, 5, 6, 7 - Principles & Practice Using C++

In this exercise I am using Visual Studio 2017 and header file std_lib_facilities.h:
http://stroustrup.com/Programming/PPP2code/std_lib_facilities.h

Chapter 14 // Drill 1

Define a class B1 with a virtual function vf() and a non-virtual function f(). Define both of these functions within class B1. Implement each function to output its name (e.g., B1::vf()). Make the functions public. Make a B1 object and call each function.

Github: https://github.com/l-paz91/principles-practice/blob/master/Chapter%2014/Drills/Drill1


Chapter 14 // Drill 2

Derive a class D1 from B1 and override vf(). Make a D1 object and call vf() and f() for it.


Chapter 14 // Drill 3

Define a reference to B1 (a B1&) and intialise that to the D1 object you just defined. Call vf() and f() for that reference.

Github: https://github.com/l-paz91/principles-practice/blob/master/Chapter%2014/Drills/Drill3


Chapter 14 // Drill 4

Now define a function called f() for D1 and repeat 1-3. Explain the results.

Github: https://github.com/l-paz91/principles-practice/blob/master/Chapter%2014/Drills/Drill4


Chapter 14 // Drill 5

Add a pure virtual function called pvf() to B1 and try to repeat 1-4. Explain the result.

Github: N/A

The compiler will fail to build on this unless you delete the B1 object creation. If any functions in a class are pure virtual then the class cannot be an object by itself. 

Chapter 14 // Drill 6

Define a class D2 derived from D1 and override pvf() in D2. Make an object of class D2 and invoke f(), vf(), and pvf() for it.

Github: https://github.com/l-paz91/principles-practice/blob/master/Chapter%2014/Drills/Drill6

Chapter 14 // Drill 7

Define a class B2 with a pure virtual function pvf(). Define a class D21 with a string data member and a function that overrides pvf(); D21::pvf() should output the value of the string. Define a class D22 that is just like D21 except that its data member is an int. Define a function f() that takes a B2& argument and calls pvf() for its argument. Call f() with a D21 and a D22.

Github: https://github.com/l-paz91/principles-practice/blob/master/Chapter%2014/Drills/Drill7

The wording of this drill reminded me of this scene from friends:

Monday 25 May 2020

Chapter 13 // Exercise 19 - Principles & Practice Using C++

In this exercise I am using Visual Studio 2017 and the graphics files found here:
https://github.com/l-paz91/principles-practice/tree/master/Graphics%20Files

Chapter 13 // Exercise 19

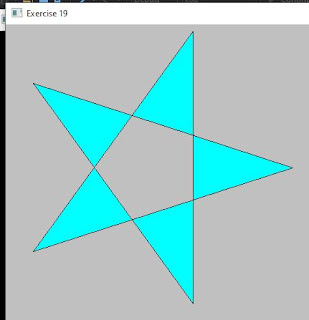
Define a class Star. One parameter should be the number of points. Draw a few stars with differing numbers of points, differing line colours, and differing fill colours.

Github: https://github.com/l-paz91/principles-practice/tree/master/Chapter%2013/Exercise%2018


For this one, I decided that the minimum number of points needed was 5. After that, I found a chapter from a book called "Connections: The Geometric Bridge Between Art and Science" by Jay Kappraff. They explain that any polygon with 5 or more vertices can be used to create star polygons by extending the lines of each side till they intersect.

I also found this excellent video https://www.youtube.com/watch?v=omsNTaNLvAA which shows how to create stars from regular polygons by skipping vertices n number of times for each polygon. This video also helped visualize the difference between a real star polygon and a degenerate star polygon.

In the end though I decided to use a function I created in an earlier exercise that finds any point on a circle given an angle. Given the number of points, each point is  angle away from each other. So I can tell this function to keep retrieving me new points until we have enough to make the star.

Chapter 13 // Exercise 19 - Principles & Practice Using C++

Chapter 13 // Exercise 19 - Principles & Practice Using C++

This works perfectly with real star polygons, however the draw_lines() function needs to be modified to fill the star in. It doesn't work for degenerate star polygons though. After some thinking I decided to go a bit simpler and create an outer circle and an inner circle. Then advance the rotation by n degrees each time selecting points alternatively on the outer and inner circle and then connecting them up. Not only does this allow 4 pointed stars but it works with both real star polygons and degenerate star polygons and draw_lines() doesn't have to modified:
Chapter 13 // Exercise 19 - Principles & Practice Using C++
(EDIT - please ignore the inner circle in this photo, it has nothing to do with the inner circle of the star...I just forgot to remove it)

I also changed the constructor so you can change the outer/inner radii and added a starting angle so you can rotate the star:
Chapter 13 // Exercise 19 - Principles & Practice Using C++


Sunday 24 May 2020

Chapter 13 // Exercise 18 - Principles & Practice Using C++

In this exercise I am using Visual Studio 2017 and the graphics files found here:
https://github.com/l-paz91/principles-practice/tree/master/Graphics%20Files

Chapter 13 // Exercise 18

Define a class Poly that represents a polygon but checks that its points really do make a polygon in its constructor. Hint: You'll have to supply the points to the constructor.

Github: https://github.com/l-paz91/principles-practice/tree/master/Chapter%2013/Exercise%2018


At first I thought he just meant check that the points are a Polygon and I was "the code already does that" however the problem comes in supplying points in the constructor. We don't know how many points will be supplied which means that the constructor needs to take in a initialiser_list<> which can be of any size. There's already a constructor of this type in the main base class Shape. As Poly derives from Shape we can use this constructor, however there was no definition so I quickly added it:
If you've ever initialised a vector like this:
vector<int> v{1, 2, 3, 4, 5, 6, 7, 8, 9 };

Then you've used the initializer_list<> without realizing it. It's a great tool in the std library to allow you to initialise an object with an undetermined amount of items. Of course I'd recommend declaring the size wherever possible for the best performance.

The next thing to do is give open_polyline this constructor as you can only inherit from direct base classes. In this case the direct base class for Poly is Open_polyline whose base is Shape.

Once this is done, default constructors will need to be added to each class to remove any errors. 


Saturday 23 May 2020

Chapter 13 // Exercise 17 - Principles & Practice Using C++

In this exercise I am using Visual Studio 2017 and the graphics files found here:
https://github.com/l-paz91/principles-practice/tree/master/Graphics%20Files

Chapter 13 // Exercise 17

Do the previous exercise, but using hexagons of a few different colours.

Github: https://github.com/l-paz91/principles-practice/tree/master/Chapter%2013/Exercise%2017

I was very sneaky on this one, mainly because the current hexagon tile function doesn't allow for hexagon colours to be changed easily. It would require a function re-write but this does the job.

Chapter 13 // Exercise 17 - Principles & Practice Using C++

Friday 22 May 2020

Chapter 13 // Exercise 16 - Principles & Practice Using C++

In this exercise I am using Visual Studio 2017 and the graphics files found here:
https://github.com/l-paz91/principles-practice/tree/master/Graphics%20Files

Chapter 13 // Exercise 16

Do the previous exercise, but with hexagons.

Github: https://github.com/l-paz91/principles-practice/blob/master/Chapter%2013/Exercise%2016

I'm not going to re-write the hexagon tile function I wrote but instead just keep supplying it with the number of hexagons needed to tile the window. It does require some maths based on the radius but it's not time consuming.

Chapter 13 // Exercise 16 - Principles & Practice Using C++

Wednesday 20 May 2020

Chapter 13 // Exercise 14 - Principles & Practice Using C++

In this exercise I am using Visual Studio 2017 and the graphics files found here:
https://github.com/l-paz91/principles-practice/tree/master/Graphics%20Files

Chapter 13 // Exercise 14

Define a right triangle class. Make an octagonal shape out of eight right triangles of different colours.

Github: https://github.com/l-paz91/principles-practice/tree/master/Chapter%2013/Exercise%2014


I really wanted to make a function that could draw any polygon with triangles but it required way to much brain power and at this point in the evening I've had quite a bit to drink and can't be bothered so I'm just going to brute force it. I was also confused because I kept thinking of a Regular octagon and seriously wondered if you could even make a regular octagon out of right triangles. I googled this high and low and managed to find this thread of someone doing the same exercise: 
http://forums.codeguru.com/showthread.php?545831-Making-an-octagon-out-of-right-triangles

An image of a regular octagon made out of right triangles is shown but there are arguments as to whether this is correct or not. So I thought, why not make the constructor throw an error if one of the angles in the triangles is not 90 degrees? Turns out determining the angles of intersecting lines is a bit more complicated then I thought.

I eventually found this post which made sense. I can't stand it when they use things like slope and r1 and squiggly symbols. I have no idea what any of that means, maths stack overflow is my worst nightmare:
https://stackoverflow.com/questions/3365171/calculating-the-angle-between-two-lines-without-having-to-calculate-the-slope

With this though I managed to give RightTriangle a function that gets the angle between 2 lines. You do need to input the points in a certain way when creating the triangle (the right-angle should always be the second point) but it is possible to create an octagon with all right-angled triangles; but it is not possible to create a regular octagon out of all right-angled triangles. 


Tuesday 19 May 2020

Chapter 13 // Exercise 13 - Principles & Practice Using C++

In this exercise I am using Visual Studio 2017 and the graphics files found here:
https://github.com/l-paz91/principles-practice/tree/master/Graphics%20Files

Chapter 13 // Exercise 13

Draw the colour matrix from section 13.10, but without lines around each colour.

Github: https://github.com/l-paz91/principles-practice/blob/master/Chapter%2013/Exercise%2013

For this one, I simply set the line visibility to false. I remember having to change this function as it wasn't working properly so make sure to grab an updated copy of the graphics.h and graphics.cpp from a newer exercise.


Monday 18 May 2020

Chapter 13 // Exercise 12 - Principles & Practice Using C++

In this exercise I am using Visual Studio 2017 and the graphics files found here:
https://github.com/l-paz91/principles-practice/tree/master/Graphics%20Files

Chapter 13 // Exercise 12

Draw a circle. Move a mark around on the circle (let it move a bit each time you hit the "Next" button).

Github: https://github.com/l-paz91/principles-practice/blob/master/Chapter%2013/Exercise%2012


.


Chapter 13 // Exercise 12 - Principles & Practice Using C++

(imagine this moving around)

Sunday 17 May 2020

Chapter 13 // Exercise 11 - Principles & Practice Using C++

In this exercise I am using Visual Studio 2017 and the graphics files found here:
https://github.com/l-paz91/principles-practice/tree/master/Graphics%20Files

Chapter 13 // Exercise 11

Draw a 300-by-200-pixel ellipse. Draw a 400-pixel-long x axis and a 300-pixel-long y axis through the center of the ellipse. Mark the foci. Mark a point on the ellipse that is not on one of the axes. Draw the two lines from the foci to the point.

Github: https://github.com/l-paz91/principles-practice/blob/master/Chapter%2013/Exercise%2011

The first thing I did was google what a "Foci" was. Apparently it is the "focus points" of an ellipse. On a circle the focus points are dead center. One thing I had to keep in mind is that the foci lie on the major axis. The major axis is the axis that is the longest, so they could change between X and Y depending on the width/height of the ellipse.

Most formulas only tell you how to find the foci given that the center point is 0,0. However, our center point is 0+x, 0+y. I then realised that maybe I should not drink bacardi and pineapple when I'm programming because it took me 40 minutes to realise that the ellipse class already has the functions to find the foci.

In a previous exercise I already made a function to find any point on an ellipse given an angle, so the rest fell into place.


Saturday 16 May 2020

Chapter 13 // Exercise 10 - Principles & Practice Using C++

In this exercise I am using Visual Studio 2017 and the graphics files found here:
https://github.com/l-paz91/principles-practice/tree/master/Graphics%20Files

Chapter 13 // Exercise 10

Define a class Regular_Polygon. Use the center, the number of sides (>2), and the distance from the center to a corner as constructor arguments.

Github: https://github.com/l-paz91/principles-practice/tree/master/Chapter%2013/Exercise%2010

Chapter 13 // Exercise 10 - Principles & Practice Using C++

I assume "distance from center to a corner" means the radius of the outer circle of a Polygon. I wish we had done this one as Exercise 9 as then I could've just made Regular_hexagon a child of Regular Polygon. 

I decided to do that and it got me thinking about a universal "tile" function for any type of polygon, however I want the tile function to remain static so that you can call it without actually having to have an instance of the object and you can't have virtual static functions in c++.

Friday 15 May 2020

Chapter 13 // Exercise 9 - Principles & Practice Using C++

In this exercise I am using Visual Studio 2017 and the graphics files found here:
https://github.com/l-paz91/principles-practice/tree/master/Graphics%20Files

Chapter 13 // Exercise 9

Tile a part of the window with Regular_hexagons (use at least eight hexagons).

Github: https://github.com/l-paz91/principles-practice/tree/master/Chapter%2013/Exercise%209

With this I wasn't sure if I should give the tiling a boundary, like a 400x400 area to tile and you pass in that area into a constructor. Or if I should push a load of hexagons back into a vector and change the x/y positions with each hexagon. I decided on giving a boundary. When you tile a hexagon, there should be no spaces in-between which makes it easy to determine where the next hexagon should be.

Considering we draw the hexagon from the center with a given radius, that means on the x axis, the next hexagon center point should be 2 radii + a side length away. On the y axis, the next hexagon center point is an apothem away. The apothem is the radius of the incircle of a polygon. 

To find the side length of a polygon, use the formula:
sideLength = 2Radius * sin(PI/numOfSides);

The apothem:
apothem = radius * cos(PI/numOfSides);

Chapter 13 // Exercise 9 - Principles & Practice Using C++

To get the hexagons to draw at different x values on a new line I used a simple flipflop:

Chapter 13 // Exercise 9 - Principles & Practice Using C++

Here, flipflop is a bool set to 0. When x becomes more than the edge, the flipflop is inverted. So if flipflop is true, !flipflop is false and then !flipflop again becomes true. We want the x co-ordinate to always be either 0 or (radius + half sideLength). If you multiply an int by a bool it will either be 0 or the number you want. This reduces the amount of branching the cpu has to do.

Tuesday 12 May 2020

Chapter 13 // Exercise 8 - Principles & Practice Using C++

In this exercise I am using Visual Studio 2017 and the graphics files found here:
https://github.com/l-paz91/principles-practice/tree/master/Graphics%20Files

Chapter 13 // Exercise 8

Define a class Regular_hexagon (a regular hexagon is a six-sided polygon with all sides of equal length). Use the center and the distance from the center point as constructor arguments.

Github: https://github.com/l-paz91/principles-practice/tree/master/Chapter%2013/Exercise%208


Seeing as how in Exercise 11 of the last chapter I already made a function that can produce any regular polygon given a radius and number of sides, this was quite simple to adapt the code.


Saturday 2 May 2020

Chapter 13 // Exercise 7 - Principles & Practice Using C++

In this exercise I am using Visual Studio 2017 and the graphics files found here:
https://github.com/l-paz91/principles-practice/tree/master/Graphics%20Files

Chapter 13 // Exercise 7

Make and RGB colour chart (e.g., search the web for "RGB colour chart").

Github: https://github.com/l-paz91/principles-practice/blob/master/Chapter%2013/Exercise%207


This was perhaps one of my favourite exercises so far as it was something I actually wanted to know how to do but always got overwhelmed when I tried to when picking a language/api.


I currently have a program that converts 24 bit bitmap images to SNES format however, it's only a command window program at the moment. One of the upgrades I wanted to add was the ability to change your colour palettes by selecting from a colour chart. I was going to do a C# winforms program however, I feel confident that I could get the program done now using FLTK and C++ which is great because I hate C#.

As a little bonus I decided to write a program that draws the full colour palette that the SNES can use. The SNES uses 15-bit GBR. It's not 16-bit RGB because Nintendo*. This means there is 32,768 colours that the SNES can display (not all at once though). I think this is known as 'high-color'. Either way, here they are:


This took me several days to wrap my brain around; colour is hard. It took me a while to figure out the name of what I trying to do. Apparently I wanted to make a 7 colour gradient heatmap. I eventually settled on this wiki here, that shows how to create a colour gradient class:
http://www.andrewnoske.com/wiki/Code_-_heatmaps_and_color_gradients

I changed a few things and added the ability to create different gradients based on how many colours you want. I also made options to create 15 bit gradients but they look pretty much the same. Instead of uploading that here I'm going to clean it up a bit and do a tutorial on how to add a Colour Gradient class to FLTK using Bjarne's suite of functions. I wanted to add black and white to the gradient map but I'm unsure how to do that just yet.

This link has nothing to do with anything really but I'm leaving it here because I know I'll forget where I've bookmarked it:
https://docs.microsoft.com/en-us/windows/win32/directshow/working-with-16-bit-rgb

*if you're interested it's because 65816 only accepts bytes that are 8 or 16 bit in length and 8 or 16 cannot be evenly divided by 3. Therefore, the high byte is padded with an extra bit. This extra bit is always set to 0 and the SNES expects it to be 0. Some people assume this bit is used for alpha (aka transparency) however it is a single bit; either on or off and therefore can't convey how much transparency is needed, so it is simply just for padding.